So we'll start off today with "Yep, still no activity inside my train shed - it is currently acting very well as a double cloths-line for me".
Now onto what IS happening. Today at the club was pretty much a usual Wednesday with work on the HO layout in the morning and running trains in the arvo. SO what work was there?
Well I got onto adding the points at the right hand end of the yard. This pair joins the right hand end to the mainline a lot closer than having to head all the way out to the normal exit. BUT it will only help those really wanting to get over to the engine shed area once it is done.
So with the help of Bruce H this morning I got these points in and wired up - AND they actually work well - bonus, hey.


After this I thought I'd better finish the short passing loop for parking cabooses and shunting locos down on the middle peninsula. This also got finished and was working well this arvo with me parking some cabooses and my shunting loco on it - perfect.
So the rough process I followed for both installations was to lay the point over the existing rail work and then cut out the piece of track the point was to replace using our Xuron rail cutters. Once the correct amount of track was removed, I got a fine file and rounded off all the edges on the rail so nothing would catch such as track cleaning rubbers, cloth, paper towels etc.


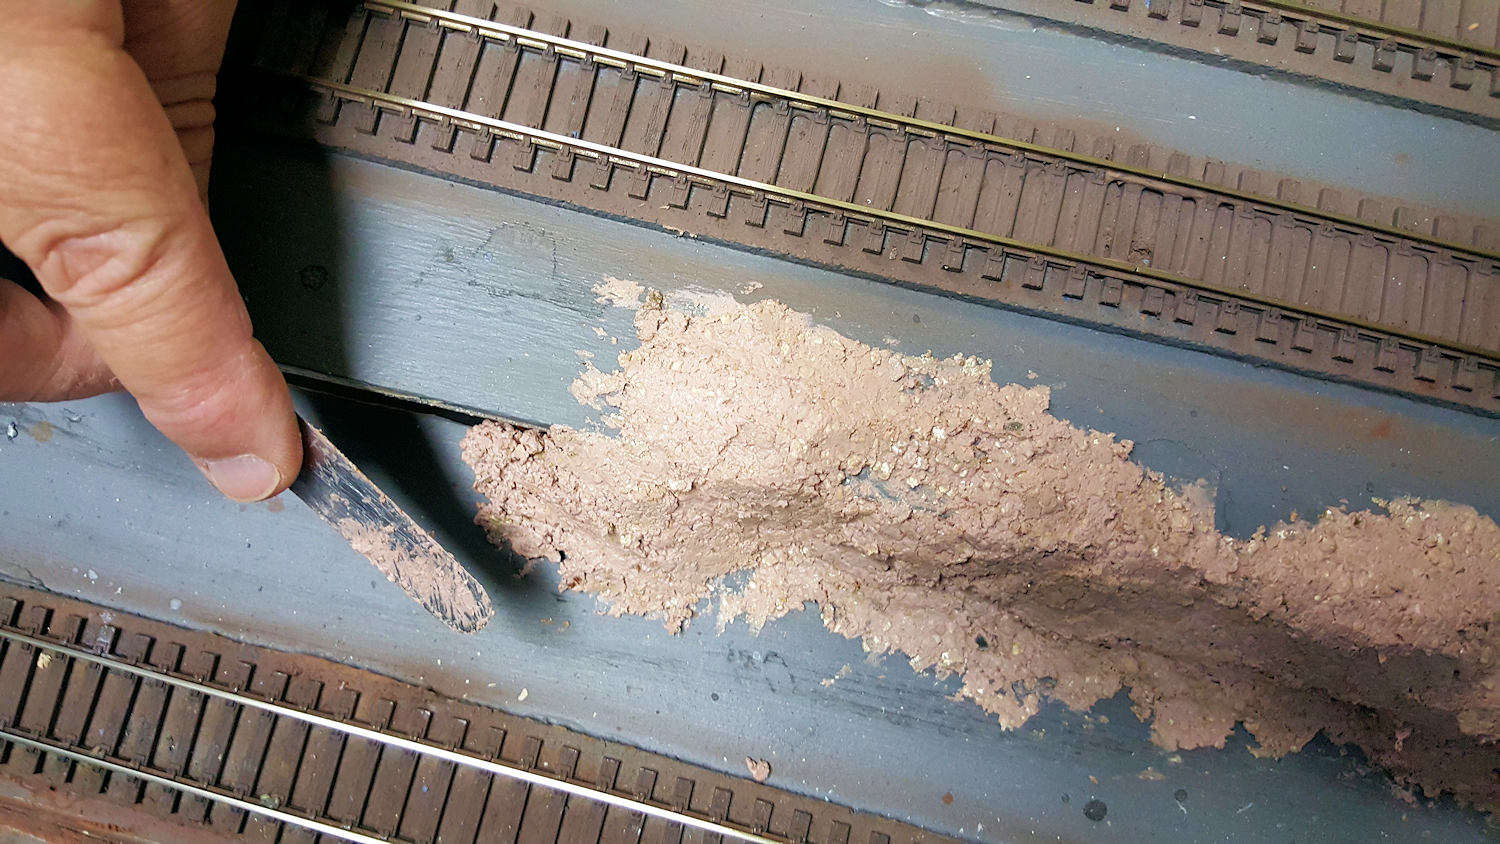
Then to allow for a little bit of realignment to be done of the exiting rail, I used a paint scraper to run under the existing track for about 300 mm or so to give us some wiggle room. Something like down in the main fiddle yard, I was able to lift a whole length of track to do the readjustment, but on the small passing loop, I could only lift about 100 or so mm.

Now as we all know, it is best not to glue in your points, so I didn't. I put the relevant insulated joiners and metals joiners on and pegged it into place with some pins. Now once the flex track was all aligned the way I wanted, I then used a 50/50 white glue and water mix to glue down the flex track whilst it was in place. I then added some pins to hold it and then added sand bags on top. With the heat of the day it dried within an hour or so and in plenty of time for running of trains later.

Now in locations where I was able to lift a whole length of flex track up, I used liquid nails to glue it back down rather than 50/50 white glue and water. So you run a small bead of liquid nails down and then smooth it out real thin with a paint scrapper. Then you quickly put the track down and it's joiners and align it correctly. Some sand bags for 10 or so minutes and it is ready to use!
I prefer the liquid nails way as it is fast - BUT make sure to only make it a very thin layer otherwise it is messy and wont be easily lifted if ever needed to be. ALSO, only do it one track length at a time as very thin layers of it go off FAST.
Now as the glue was drying, you don't stand around doing nothing and drinking lots of coffee - there is still more to do. So it was time to add in some sleepers into the gaps. So from scrap track pieces you get the required number of sleepers you need and with a sharp scalpel or box cutter, trim the rail chairs off the sleepers. You can then slip them under the rails and using a few drops of 50/50 white glue water mix, glue them in place.

The above photo shows chairs in place on the left and chairs removed on the right.


Now it was time for a coffee. Once fully beaned up, the glue had dried and I could get at the tracks. This time it was to put in the power feeders. Since these were just short tracks and not mainlines or such, it was acceptable to just power these new short track pieces from the nearest acceptable mainline or shortline. So with a 2.5 mm drill bit some holes were made next to the rails in all the required spots. Then with our trusty Dremel moto-tool with a wire brush, I cleaned the paint off the sides of the rail so I could solder the rail.


Of course some real life train testing is required and if successful - a good pat on the back and another cup of coffee.

Some REAL work was being done by Dave. He HAS been busy at home getting point motors and such ready for testing. He has been working with Tristan who has now laser cut a pile of plywood mounts for the small servo motors. Dave has also been busy making up some Arduino systems to drive the servos - all very technical looking and from the reading of it on the club forums, will be very very good.


Dave has also made his own circuit board up and built a server motor measuring centering thingamebob so that each servo can be measured and calibrated, as they all do vary a bit.

So that brought us up to about noon and the running session in the arvo. Happy trains until next time.