Sunday, October 15, 2017

The Day of the Convention

After a partially sleepless night it was time. Time for the Model Railways for a Day convention.

So I loaded up the car with all the bits I needed for my talk and display as well as the modules Craig and I made the other day for all the punters heading to the convention. No room left for passengers, that's for sure.


We had all sorts of talks happening during the day as well as displays and discussions. Soldering, scenery, making trees, making dunnies (Scooter is good and making dunnies), research, spray painting, DCC, Ops, track laying, ballasting, static grass  and much more. It was a very full day for all.

Jim was there to show and talk about buildings and what great buildings he makes - master building this chappie.


Scooter, I mean Craig, was there showing building with styrene and ensuring everyone got a dunnie to build.


I was in the middle of the mix with baseboards for scenery and got to show off the various methods with my dioramas I built during the week.


Everyone got to take a diorama base of foam home with them to practice what they learnt.


Geoff was doing track laying and giving out some very good info - even I learnt something from him.


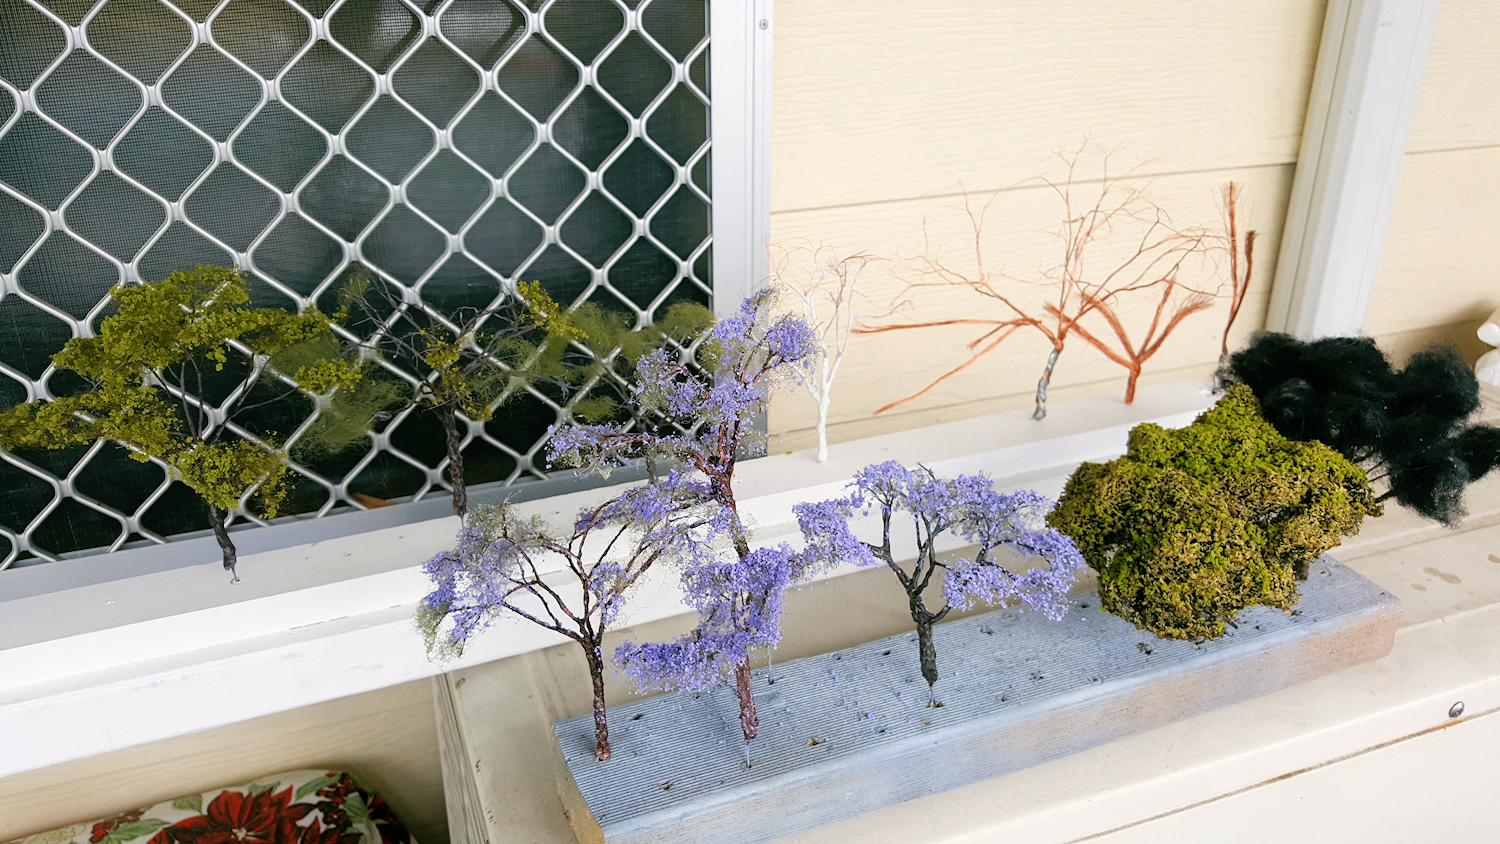
Kerrie was talking about making trees and wow, some of these the attendees were making after Kerrie show how, were great. Backdrops were also a specialty she was talking about.


Bob was there showing how to spray paint - he's good that fella is.


Ken was doing ballasting, always a wanted skill.


And you know what, I damn well forgot to get any shots of Martyn who was doing the DCC talks, Brendan who was doing Soldering as well as Arthur who did Operations as well as Making it Real and of course our Research King Mr Mewes.

I think I got everyone and I do know that the attendees did garner a great range of knowledge on the day and enjoyed themselves very much including we lecturers.

I'll leave you here with a view of Scooter yacking away in front of a rapt crowd.


Friday, October 13, 2017

Sowing the Seeds and Working on the Railroad

Friday saw me down at the club again working on my modules for the convention, as time is a tickin'.

I found that the grass was still wet, so I placed the modules out into the direct sunshine so that over time the warm sunshine will dry them out.


So today was time to plant some trees and lay a bit of track. I used a variety of trees, some were just cheapies that you buy online from China for 20 or 30 cents each. Others were some nice Pine trees from I know not where (maybe Woodland Scenics I think). Then there was the Woodland Scenics Fine-Leaf Foliage which I'd never used before - it has potential. Also for small stuff around the place I used the Woodland scenics Bushes and Clump-Foliage. 

So I laid out all my tools and stuff and got into it with of course my radio blaring away on 4KQ


So after drilling holes into the plaster and using an awl for the foam (much easier than plaster I can tell you) and fixing various trees into position with white glue, I then used the coloured foam Bushes etc to add in small details all over the place. Then it was outside for the modules to take in more of the sunshine we had on Friday.


Next I got the track laying gang out and laid some rails. I used Liquid Nails applied nice and thin to the cork and then pressed the track onto this. It is only a thin layer of glue and hence it dries nice and fast. Once I pressed the track down into it I placed some long sandbags we have at the club onto the track to hold it for a while to make sure it sticks. The sandbags are just 2 cm diameter material hoses a good members' missus made up for us and then stuffed with sand - think of draft excluders.

Once all four modules were done I got out a selection of various ballasts I had made a while back out of various gravels and slates and shale found in the area - hence free. I sprinkled it down and then shaped it with a small brush before spritzing on some water and isopropyl alcohol mix to wet it all down and then I dropped on some 50/50 water and white glue mix to hold it all together. Then I placed it outside in the sun to bake some more. After an hour it was hardening up nicely.


Then it was time for home and a relax and maybe a beer... or two.

Growing a Lawn

So Thursday saw the need for me to start tending the lawn, the four lawns on the modules in fact.

So first up I used my medium sized Surform rasp to clear any debris from the right of way on each module. I am pretty much doing this between each step so that they are only small removals rather then whopping big ones which become awkward.


Then I got my tools and makings out and ready and of course my cuppa - black and strong (no comments Scooter, I know you got one in there somewhere). For the grass I use the Woodland Scenics Fine Turf in a couple of colours, the primary being of course Burnt Grass. I also use the Burn Grass colour from JTT Scenery Products as it is close but not the same as the Woodland Scenics and gives variety without hitting you in the face with a lime green or something.


So the first cab off the rank was the cardboard and plaster module and it got a good planting of grass with thinning patches here and there.


I then got into the swing of things and plowed the paddock on the other three modules for nice paddocks for the cows to eat. So by the end I had the four modules grassed and that was it for these modules for the day as they were quite moist and needed a lot of drying.


When I got home I decided to cut and glue up a couple of modules of foam for my part of the convention - I obviously need something to carve and such on the day. So I made up one of Extruded Foam and it took all of a single stubbie of beer to roughly carve and glue. My excuse - it was a hot day and I was dehydrated and needed liquid to sustain me.


So with the Extruded Foam module, I gave a rough shape to it and glued the parts together with Liquid Nails - the water based version. Before gluing, I roughed up the surfaces with a saw blade to make sure the glue had good purchase.


The second module I made of Expanded foam, the beaded stuff. It also was a one stubbie job due to the heat, not that I work slow (shut up Scooter).


Thursday, October 12, 2017

Slopping on the Dirt

So yesterday I went down to the club to continue on my demo modules for the upcoming convention and to slop on some dirt all over them.

First up I made up some slop - this is the No More Gaps, Paint and Water mix I use. So a good dollop of the Parfix Gap Filler (cheaper version of the Selleys branded one) into my Ice-cream container and then in with about the same amount of water. Then maybe a teaspoon or two of Burnt Umber cheap acrylic kiddies paint to colour it so it is no longer white. This colouring makes it so that in case the scenery gets chipped in the future, white doesn't show through, but a dirt colour does.


I gave the foam based module a lick of this goop to act as a sealer and to give an undercoat for the scenery. It is quite amazing how this layer of gap filler tightens up the surface yet stays rubbery into the future allowing easy modification of the scenery with just a box cutter - no grinders or side cutters or mess either. Yet another reason I like scenery with foam.


Now here is a close-up of the Expanded foam after a coating. You might be worried that the holes where the beads were might be a problem - well, not really. Another coat will fix it, but by the time the dirt goes ever the top, then the grass, then the shrubs and trees and rocks and any other scenery you might want, you cannot tell that the holes were ever there.


I put this module aside for a bit and got the other three modules out to give them a base coat of dirt. In this instance I used various materials I gathered myself as it is just as good as the bought ones and is CHEAP (I can now hear Scooter saying "Just like you!"). There was real dirt (clay and dirt from the creek at the back of the club) and I also used shale based materials found on a drive down the road from the club (see previous article http://mixedpk.blogspot.com.au/2016/01/digging-dirt-and-dust.html). The only other items needed was of course the white glue mix - so you get white glue and water and mix them evenly, oh, say about 50% of one and 50% of the other. Then you add a percent or so of detergent.


So all that is required to put the dirt on, is to get the paint brush and slop on the white glue mix as heavy as you can (without getting Noah involved) and then sprinkle on the dirt you want. Some people put it in a container and shake it on like you would salt and pepper, but I just use my fingers - OK Scooter, I admit it, I am a grub, but it works.

Now here's a thing about putting on the dirt. Now if this was the top layer of scenery and no other items were going over it, ie no more glue being slopped around, then you have a choice. You can let the dirt get completely soaked in the glue and therefore turn out a darker colour, or you can sprinkle enough dirt on so that eventually only the bottom of the dirt grain gets glue on it and the top stays its dry and more paler and brighter colour.

You will note that the three modules getting the dirt also had colour on them now. I had just painted the plaster surface with some kiddies acrylic poster paint and water mix - again it is just so that if the module gets chipped, the white doesn't show through.


So the three modules got their dirt and put aside to dry overnight. Please note that I could have gone on to adding the grass straight away, but I was feeling off colour by then. So it was time to head home and watch some train shows with Michael Portillo doing the talking - what clothing colour style the fellow has.