Wednesday, February 25, 2015

After the Obligatory Morning Coffee

After the obligatory morning coffee at the club-room and gasbag to whoever is willing to stand still for more than 30 seconds, I got into cutting the skyboard some more and jigging around to get the lay of the track for the wye. This actually took me all morning to buggerise around cutting skyboard, cutting deck, cutting cork, cutting anything that was or wasn't nailed down!


I think I now have the alignment I need. The next day I go down to the club will be to get some 12 mm plywood and make a strip about 50 mm wide for the cork to be laid on. This will need to drop from the track along the back wall down to the track on the peninsula. This drop is maybe 40 mm or so over a length of about a metre and a half I reckon. The piece doesn't have to be accurate in width as long as the track will fit. This is because the mountain and cuttings will sit around it and hide all the imperfections - and I make many of those imp thingies.


While I was hacking around this area, Barry P arrived, so he gave the ply he added the other day a lick of white sealer. After this he started on adding in some scrap 3 mm sheeting below where some foam will be added between the station and the big canyon scene. The thin sheeting will make the foam a lot more firm and cater for instances of people leaning on it.


Once I stopped work on the wye it was time to cleanup for those members wanting to run after lunch, then I of course had lunch. But just before heading to lunch I decided to Surform the foam Barry P had added on the other side of the peninsula last week.


After the fang I decided on a less messy piece of work - as far as it affected the trains running round the layout now. I decided to make up some of my foam putty and bog up all the holes and gaps in the foam I had laid on the peninsula to make those rolling hills. I used my normal recipe, but with a small twist. As mentioned in older posts, I came up with my mix after reading of some modellers in the states making up a plaster, clay, wood glue and vermiculite mix. My mix today was vermiculite since it is compressible, foam beads swept up off the floor after shaving the foam with the Surform tool, cheap kiddies poster paint (burnt umber, yellow ochre and raw umber), lots of acrylic Gap Filler and when needed, some white glue to make the mix a bit more moist.

How much vermiculite depends. Since vermiculite costs money and the foam beads are free, it does colour your judgement. If the filler surface doesn't need to be really smooth, then leave out the vermiculite. If it needs to be really really smooth, then leave out the foam beads and just pour in the vermiculite. ie, ya play around with it :o)


I used an old ice cream container to mix it all up in. Once it was at a really lumpy oatmeal stage, it was ready to use. 


All the big holes and gaps got puttied with a normal paint scraper to work it in and then smooth it out. But for all the areas needing to be a bit more tidy and also near the track, I used some artists clay sculpting tools which I also use for plaster work as well - very handy indeed. 


I managed with 2½ corking guns full of gap filler to get most of the foam filled. There is only maybe a ¼ of a gun load left to do, but I couldn't be bothered making that last mix today, as I could definitely hear a beer calling - I really could. So these last shots show the rolling hills as they stand this afternoon.


So on Saturday I might be able to get around to giving the whole set of rolling hills a lick of straight Gap Filler and brown paint to skin it up and give the base we need before adding dirt and grass.


Sunday, February 22, 2015

Wet Day

With all the rain around because of the cyclone up north we were in for a wet day. So after a cuppa it was down to the club for a lot of gasbagging, and a little work.

I didn't get around to much visible work as I was buggerising around cutting into the skyboard with a keyhole saw to allow for the wye to be put in. Eventually with some cutting and re-cutting and re-cutting and re-cutting, I got there - I think. I had to move the point the length of the point further away from the skyboard to get a better track radius. So instead of a 60 cm radius we have about a 90 cm radius, so that should be good. This time I also remembered to drill the hole under the point to allow for the solenoid to throw!


John B has been busy and has started to carve the waterway in the area he is working on. He has also added in some more foam on the front edge leading to the right and the lower station area. The photo shows John being surprised as he is working.


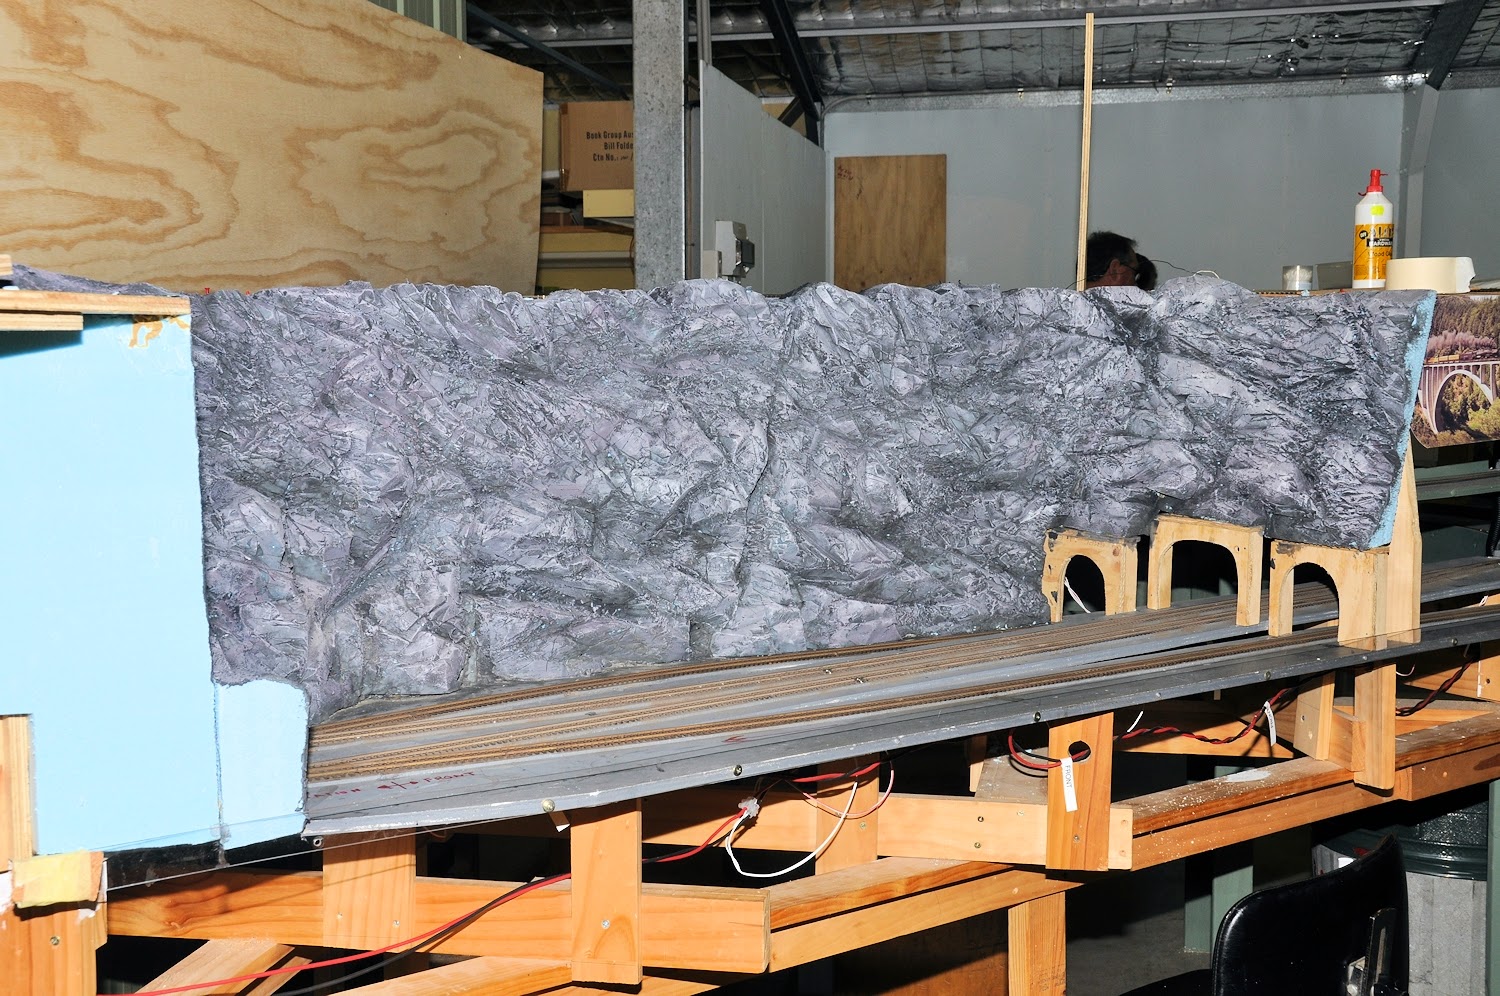
Peter A did a lot more prep work for the big bridge he is doing. He has made up a paper mock-up and draped it down from a piece of timber so we can now see a rough-out of the bridge - looking very good indeed. Peter then added in some more colour washes to the large rock faces he is building to the right of the bridge at the base of the helix. This also is very nice indeed.


Darryl had been busy during the week with more track and point work going down along the wharf area. This is really taking shape. There will even be cutouts of ships further out to sea as per this small example. 


Darryl has colour printed out a range of freight ships, passenger and tugs and will select some suitable ones to add into the background. It also looks like a big giraffe style container crane will be crafted by Darryl and is most like going to have a bunch in N scale mechs in it so it can move along some rails!

Now here is a stitched up panorama photo of the wharf area - hope it turned out.


Wednesday, February 18, 2015

Snow Season is Almost Over

Today I was able to really hack into making snow on the layout - there were quite a lot of foam beads flying today.

I was able to add in another couple of sheets of foam at the base of the peninsula and carve up some existing ones. So it it much more complete than before. I think it is looking pretty good myself.


Barry P showed up and continued with some work, primarily getting some plywood into the area to the right of the station, so that some sort of facility can be designed and built there to add to operational capability on the layout.


A few days ago John B carved out some ply deck and added in some foam so that he can make a small stream or causeway/drain.


As you can see above, we now have an orange step or two. These Gorilla brand steps are great and nicely stable. It was quite handy to get me up a tad higher so as to be able to lean heavily onto the foam for additional shaping force.


The creak or water course will look good here as there will be a bridge or culvert at the back and one at the front.

And the cat dragged in one of the irregulars - Darryl D. So he continued working on the wharf area and laying track and points - lookin' good the 'ol wharf is. More photos next time.

Sunday, February 15, 2015

February '15 - The Year is already Flying by

Well, Saturday was the monthly meeting day for the RMCQ, so not as much work as usual gets done!

I did go out to Supercheap Auto and grab a couple of cans of Grey Primer spray paint. Some then went onto the instant coffee container lids Peter A and I have been collecting - it's a good coffee to drink - "Avalanche Duo. The glass jar comes with a plastic lid that is a cylinder of 74 mm diameter x 135 mm high. They sort of stand in well as oil and gas tanks. I sprayed three at full height and cut a couple down to about 60 mm. These can hang around looking like they mean business holding fuel until we purchase or make some real models for those locations on the layout.


I got an hopur of foam carving in on the right hand end of the hills section. Almost right. Then I can continue to the end where it will meet the hill/mountain where the wye will be. After chatting with Matthew F, he said it is pretty much as he'd imagined and for me to continue - saweeet.


Craig M brought in his timbers and makings for the wooden bridge he is building for the crossing of the rails to the right of the river. 


It will be a modified 18' 2" NSW bridge to suit the large gap created by two mainlines instead of the normal single NSW line. This will look really good I reckon. We see Jim H and John S looking over Craig's shoulders as he takes some additional measurements.


Peter A continued work on the header area to the helix which is coming along nicely. Peter added in a wash of grey paint in some No More Gaps and water. This gives a bit of texture and lets us see what we have much better for now. I think Peter will be going with a pink granite finish in the end.


At the end of the fiddle yard peninsula, Peter A and I have been mulling around some ideas of what might be. I laid out some scrap track and template points to see what might fit. I'll also donate a Walthers kit I have called "Commissary/Freight Transfer Building" which is about 300 mm long, so either in one piece of cut down the middle to make 600 mm of building, we'll get it in and give us part of a nice scene for boxcar loading/unloading. We'll need to do up some SCARM drawings to see what fits for curves and points - no real big rush. I reckon we can get maybe three or four small operational locations around here.


Wednesday, February 11, 2015

Oh, and Arthur - It's Your Fault!

Now before I get to Arthur, of the Tuesday Night group I attend, I'll detail the first part of today.

Of course I headed down to the club and got straight into it with the foam tools and the beady eyed foam. I huge mess ensued and lots of fun as I carved it up. A lot of progress on the rolling hills was made, but more is still required. But the fellas at the meeting on Saturday will be able to get a good idea of rolling hills.


And now to Arthur. The Tuesday Night group meet last week on Tuesday at Arthur's place. As always a great time was had. There were a couple of the new Wuiske QR 1550's charging around on the 12 mm track and looking good while doing it. They are very tempting indeed. Here are a few short videos of the QR's:


But also on the layout was an Auscision NSW 73 class from a little while back, a few of the latest TrainOrama NSW 48's. Here is a quick video of the 48:


And the most recent - the NSW 45 class loco from Auscision. Yes here is a video of the 45:


Scooter had his 45 there as he'd gotten his better half to collect it at the PO that arvo - he went for one of the ones in Marlboro livery as had Darren. Now I said earlier it's Arthur's fault, and yes it is. His layout looks so good with these locos running around with great sets of wagons behind them, that a fella just cannot, I say cannot, resist!

So lunchtime Wednesday (the day after the Tuesday Nighters meeting) I rang Auscision and ordered one! I got the running number of 4509 which is Indian Red (1970's) with single marker lights and buffers. The post man delivered it yesterday, so here is my new baby. I did a bit of running in on DC at the club on my new rolling road too - neat gadget. She runs nice and quiet under DC and crawls along as well when required.


Now to decide on a decoder. I know it will need to be sound, but the question is do I go for the cheaper option and therefore the Tsunami TSU-AT1000 with the Alco 251C donk in it which therefore needs to be soldered in, or do I go for the ESU one that comes with a real 45 sound set (at a bit more money) but plugs straight into the 21 pin plug? Following a few threads in some blogs from those that know what they are doing, would suggest the Tsunami if I want to consist and do momentum with my other 47's and 49's that have Tsunami's in them. I suppose it coils down to how lazy I am.  We'll see.


Till next time, have fun.

Saturday, February 7, 2015

Staggering Vertical Wall

Peter A continued, with a bit of help, carving up the vertical wall that will be the main feature between the helix and the river crossing. Spectacular is all I can say. This will be a really great scene on the layout.


In the half dozen hours I spent at the club today I managed a few more slabs of foam for the farmland and rolling hills area and did some carving. There is one heck of a lot of carving yet to go, so the shots only show a bit. A lot of the foam needs to go to make it a nice flowing gentle hillside type area.


After a discussion with Peter A a bit of a trim was done on the right hand river hill top as it really wasn't a good continuous slope - now it is.


Barry P came down and lent us a hand and was able to get some plywood into the gaps on the small industrial side of the peninsula. This will allow us to add some foam in relevant areas and see what we can come up with to finish that side.

Thursday, February 5, 2015

1.1V B ledoM 2 iP yrrebpsaR

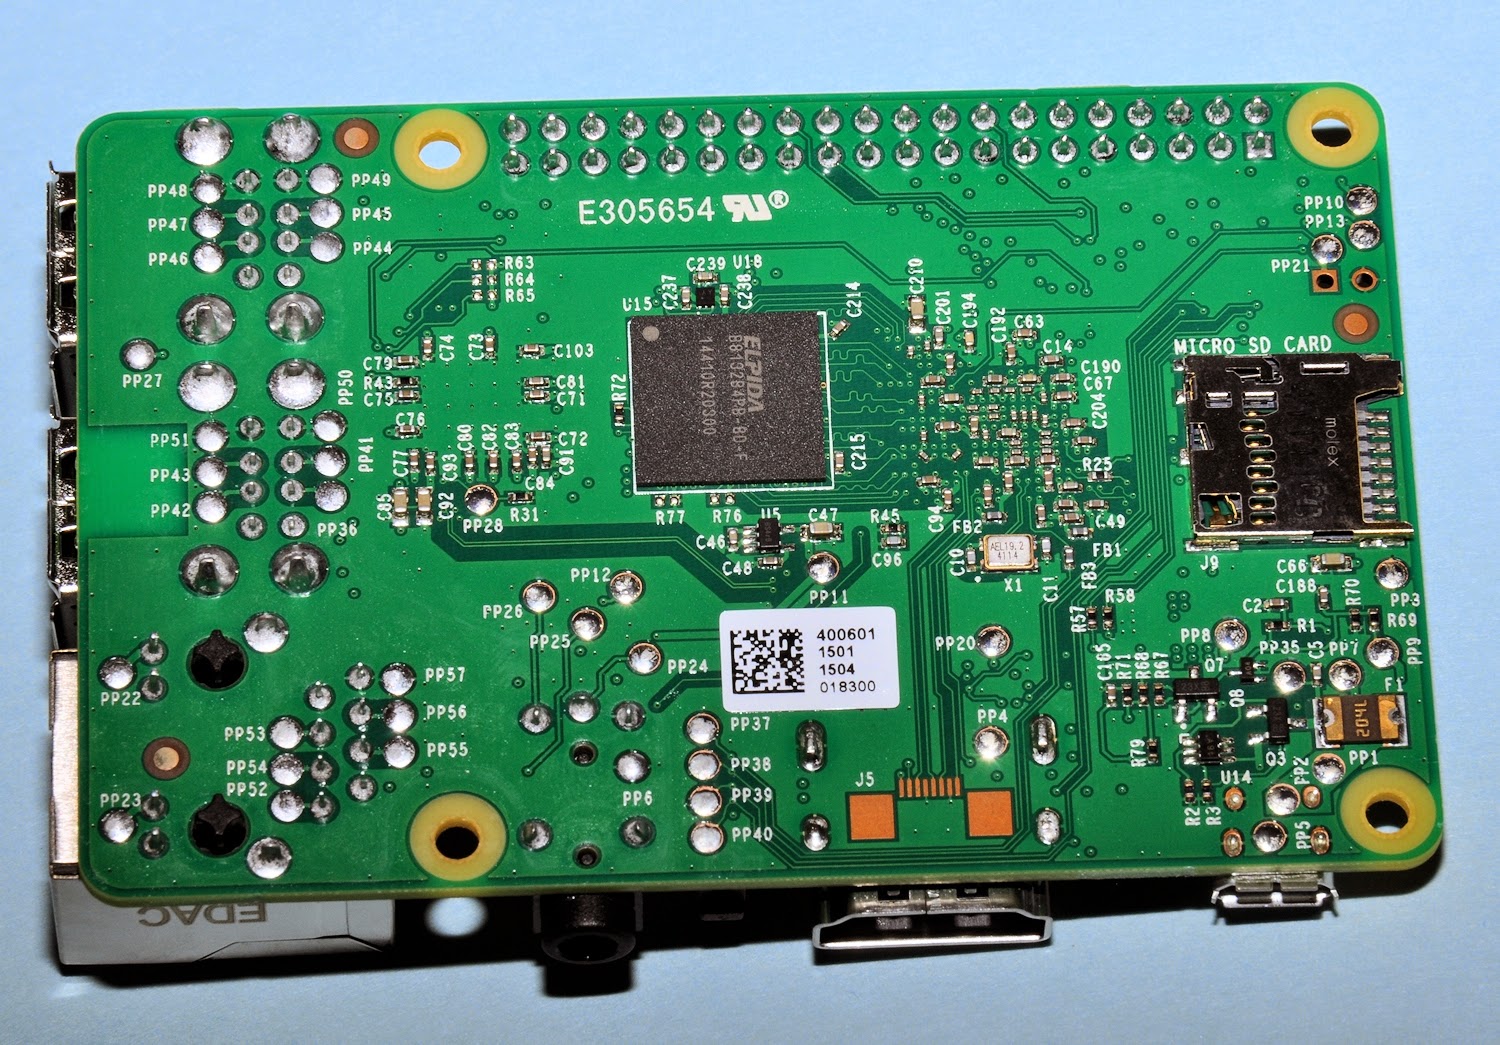
Woo hoo ! My new Raspberry Pi has arrived - the new Raspberry Pi 2 Model B. This is the new one announced only on Monday this week :o)


Greg B and myself spotted the news article printed on Monday and we so impressed, I tracked down a supplier - the every ready Element 14. But they didn't have any - no one did (insert sad face here).

But when I rechecked on Tuesday, they had supplies in so an order was quickly placed while stock was available as they are a VERY hot item. So we ordered a R-Pi 2 each plus a power supply each and a case each.


Got home and found a nice package waiting for me full of raspberries. So here are the details of the new beast garnered from the official website - www.raspberrypi.org/


The Raspberry Pi 2 Model B is the second generation Raspberry Pi. It replaced the original Raspberry Pi 1 Model B+ in February 2015. Compared to the Raspberry Pi 1 it has:

A 900MHz quad-core ARM Cortex-A7 CPU
1GB RAM
Like the (Pi 1) Model B+, it also has:

    4 USB ports
    40 GPIO pins
    Full HDMI port
    Ethernet port
    Combined 3.5mm audio jack and composite video
    Camera interface (CSI)
    Display interface (DSI)
    Micro SD card slot
    VideoCore IV 3D graphics core

Because it has an ARMv7 processor, it can run the full range of ARM GNU/Linux distributions, including Snappy Ubuntu Core, as well as Microsoft Windows 10 (see the blog for more information).

The Raspberry Pi 2 has an identical form factor to the previous (Pi 1) Model B+ and has complete compatibility with Raspberry Pi 1.


So I wont rush into playing just yet as I have other things on tonight, but it wont be long. I reckon with the extra oomph under the bonnet and the fact that Microsoft have announced they are releasing a FREE version of Windows 10 to run on this Pi, things will be very interesting indeed.

So for those that don't want to play Linux for their JMRI, you will be able to play Windows.